Showing posts with label Wall art. Show all posts
Wednesday, July 10, 2013
Toddler Feet: Painting Butterflies
Our two year old has requested a purple butterfly room in our new house and I knew just the craft to do for it! Not my original idea, lots of talented moms out there have done this already, but today was our turn! Didn't they turn out cute?! I love them! We just used plain white paper because I'm not sure how I want to use these butterflies in her room yet. More than likely I'll frame them, or modge podge them onto something. Ideas?
We had a lot of fun making these this morning! I even snagged my wiggly 8 month old to get his foot print and handprint stamped. Better add those to the scrap book! Our mess was mostly contained too, except for the little bit that made it to the floor that I didn't notice until after little girl had walked in it and little boy had crawled through it! No biggie- scrub, scrub, scrub!
We didn't want to put the paints away, and really- what's the hurry? So we used sponge brushes and q-tips to create some more masterpieces.
Sunday, October 28, 2012
Chalk Board Kitchen Art
Growing up, my mom made delicious home made breads. Nothing quite like walking into a home filled with the aroma of fresh baked bread now is there? She always cut the loaves on her wooden bread board, the same bread board that I happen to have in my possession now, but that never gets used for serving amazing bread any more. So, what to do with it? I turned it into some functional kitchen wall art!
I turned it over and went to work on the back of the bread board. All it took was a little bit of sanding, masking, and chalk- board- paint painting. I used letter stickers for What's For Dinner and dear husband screwed in the little hooks for me. I can use them to hang the chalk along with recipes and meal plans.
Tuesday, September 11, 2012
A Fathers Art
My incredibly talented husband made his artistic contribution to the baby nursery!
To make attaching it to the wall easier, we ironed interfacing to the back of his design. This held the bulk of the truck together all in one piece. Then, he "painted" his creation onto the wall using the incredible "goo" (home made wall paste) and applied the little decorative details on top. He seriously impresses me.
We were going through some boxes the other day and came across these car and truck drawings that he had made in high school! Aren't they cool?? I think it's awesome that he still has them and aren't they perfect for little mans nursery?
Wednesday, September 5, 2012
DIY Bunting Wall Decals
The wall above babys bassinet is awfully bare, so I added a little man themed bunting that matches the rag quilt I recently created. I stuck them right to the wall where I wanted them using a DIY wall paste (recipe below).
I've used this wall paste before, like when I plastered a quote from the incredible book, The Help, by Kathryn Stockett onto the living room wall in our last apartment:
The best part is, and I do speak from experience, the decals peal right off with absolutely no damage to wall or paint.
Here is the recipe for this incredible goo:
I've used this wall paste before, like when I plastered a quote from the incredible book, The Help, by Kathryn Stockett onto the living room wall in our last apartment:
| Wall quote from, The Help. |
Here is the recipe for this incredible goo:
1/8 cup corn starch
2 1/4 cup cold water, seperated
Mix the corn starch with 1/4 cup of cold water and set it
aside. Bring remaining 2 cups of water to a boil and then added the corn
starch mixture. Boil for about thirty seconds and then let
cool before using a paint brush to paint the back of the letters, stick
the letters to the wall, and paint over the front of the letters.
I suggest keeping a rag ready to catch any possible drips, but really this isn't a messy project. I've heard of clever people mixing up a big batch of this goo and plastering yards of fabric onto walls as if it were wall paper. Perfect for those of us who are renting and can't actually use wall paper or paint to decorate. The awesome part is that when you want to remove the fabric, you simply peel it off, wash it and use it in your next sewing project!
Wednesday, July 11, 2012
Sprucing up the place
In the 3+ years we have been married we have moved seven times! That's ok; each place we lived in was right for that time, but it sure makes for a lot of temporary homes! I've had a really hard time wanting to put any effort into this apartment because we'll be leaving it too, eventually. It really is a shame because we do love this apartment, I'm just... burnt out, ya know? I have discovered though that a house, or apartment, or even just a room doesn't feel comfortable without personal touches. Bare walls and empty shelves make for cold, uninviting spaces. So, I spent some time this morning sprucing up a bit. It wasn't time consuming, it didn't cost me any money, and yet I smile when I walk in the room now.
I started in our entry way and finally hung something on the wall. Straightening up wasn't enough, so I put our "therapy beans" in a glass vase with flowers and made a magazine holder out of an empty cereal box, some modge podge, and fabric. "Therapy beans" are what I have lovingly nicknamed the kidney beans that I pull out when my daughter is throwing a tantrum. I sit down in a different part of the room and start playing with the beans. Distracts me enough to keep me calm while she is screaming, and soon she comes over and starts playing too. As it turns out, beans are much more fun than crying and carrying on by oneself! The vase will be easy to dump out and refill and looks prettier than the tupperware I had been storing them in on the kitchen counter.
Then, I worked in our little dining area by adding something nice to the table. All I did was tie some ribbon around three vases I found in the cupboard and filled them with napkins, silverware, and fresh green onions- respectively. Anyone else regrow their green onions? Man- they last forever when cut down and stored in water!
I started in our entry way and finally hung something on the wall. Straightening up wasn't enough, so I put our "therapy beans" in a glass vase with flowers and made a magazine holder out of an empty cereal box, some modge podge, and fabric. "Therapy beans" are what I have lovingly nicknamed the kidney beans that I pull out when my daughter is throwing a tantrum. I sit down in a different part of the room and start playing with the beans. Distracts me enough to keep me calm while she is screaming, and soon she comes over and starts playing too. As it turns out, beans are much more fun than crying and carrying on by oneself! The vase will be easy to dump out and refill and looks prettier than the tupperware I had been storing them in on the kitchen counter.
Then, I worked in our little dining area by adding something nice to the table. All I did was tie some ribbon around three vases I found in the cupboard and filled them with napkins, silverware, and fresh green onions- respectively. Anyone else regrow their green onions? Man- they last forever when cut down and stored in water!
Sunday, February 19, 2012
Living Room Face Lift
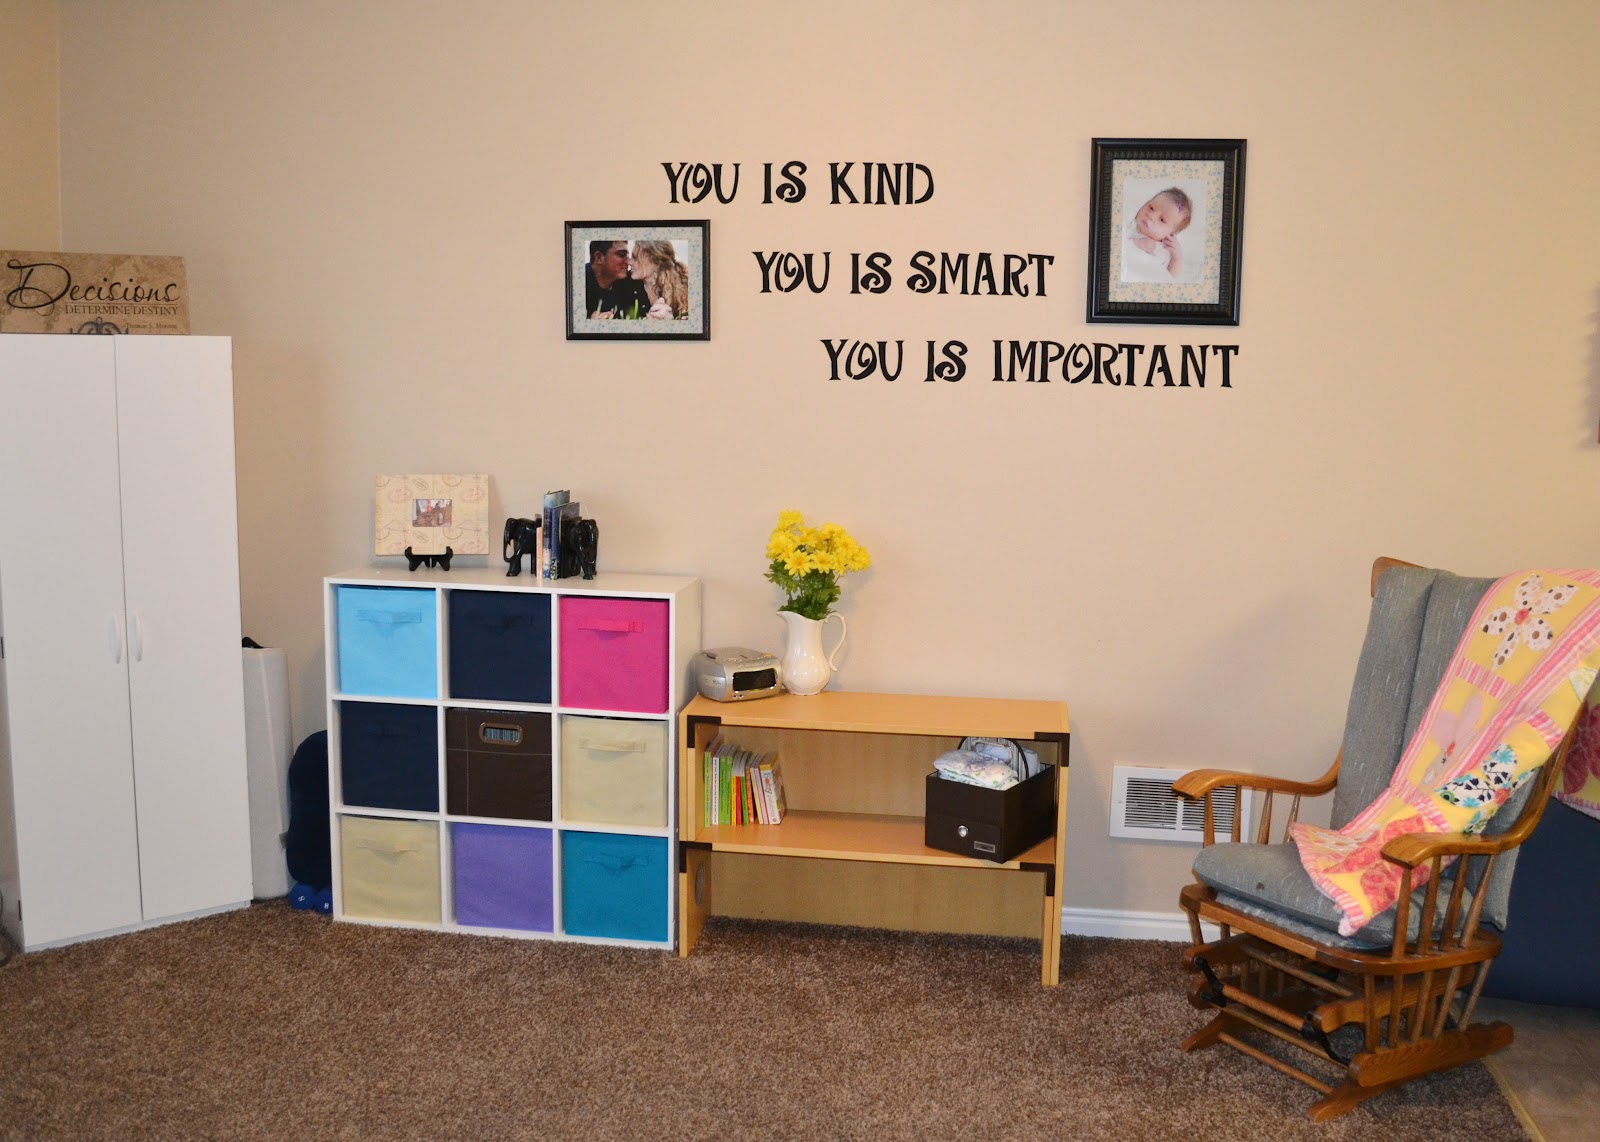
We've always had a rather plain living room, but when we sold our TV the large empty wall screamed out for help! With five dollars and only an hours worth of rearranging furniture and painting fabric letters with corn starch and water, our home looks a lot better!
Before:
After:
When I read The Help by Kathryn Stockett, I was touched by her character, Aibileen Clarks, commitment to offer up consistent positive reinforcement to the little girl she looked after. Her phrase, "You is kind. You is smart. You is important." caused me to related to the little toddler who was so lucky to have her. Don't we all need to hear wonderful truths about ourselves? I started whispering her words in my sleeping daughters ear, then I'd tell her them while we played, and finally I began to repeat the phrase whenever I was at my wits end dealing with the fussy mischievous version of my little girl. We all need to be reminded of our best, when we are at our worst! (I may or may not be referring to myself and not my kiddo here.) My husband and I rented The Help as a movie and I was so pleased when he told me, on his way out the door, that I was kind. I was smart. I finished for him, "and you is important!" We've adopted this as our family slogan and it only made sense to display it in our home with our family photos. I need to replace our daughters one day old picture with a more current one...
I traced stencil lettering onto black fabric and "pasted" them to our wall. Seriously, it really was that easy! I even did a tester dot around the corner to make sure it would peel off without harming the paint job. It did. I've seen this technique floating around pinterest, and even came across a blog where a woman "wall papered" a whole room using starch and fabric. Rumor has it, once you peel the fabric off the wall you can wash it and sew with it later! So, what's the recipe?
I mixed 1/8 cup of corn starch with 1/4 cup of cold water and set it aside. I brought 2 cups of water to a boil and then added the corn starch mixture. I boiled it for about thirty seconds and then let it cool before using a paint brush to paint the back of the letters, stick the letters to the wall, and paint over the front of the letters.
Tuesday, November 29, 2011
Christmas Decorations
I love the holiday season! Had no desire to mess with a tree though. Our apartment is just too small, and our little girl is just too ornery! Here is what we did instead, inspired of course by pinterest.
![]() |
| Wrapping paper tree and Snowman refrigerator |
Friday, September 16, 2011
Babies don't keep
The cleaning and scrubbing will wait
'till tomorrow, fore children grow up,
as I've learned to my sorrow.
So quiet down, cobwebs.
Dust go to sleep. I'm rocking
my baby and babies don't keep.
-Ruth Hulbert Hamilton
I painted these wood letters that I already had on hand. Printed the last verse of the poem, "Babies Don't Keep," onto vellum paper and used modge podge to get the phrases onto the letters. I also decorated the letters with some buttons I had in my craft drawer. Then, I cut up an old tee shirt and sewed the rough edges together. I needed something to attach it all to... so I took apart our clothes drying rack. Then, I folded over the top of each strip and sewed so that a loop was formed. I threaded the piece from the drying rack thru each loop and hot glued the other end of the fabric strips to each letter (F A M I L Y). Finally, I tied black ribbon around the white pole and into bows that sit lovely on the two nails my husband hammered into the wall for me.
Saturday, August 13, 2011
These totally count!
These totally count as being home made because I painted them. I was motivated by the fact that one white frame cost $15 dollars, and one wood frame cost $5. So heck, with a little work I got three for the price of one! My brother took our family pictures. My husband took the pictures of the flowers at the BYU-I gardens and he also took the beautiful picture of the Rexburg LDS Temple. He is becoming quite the photographer; he sees things I would never notice. You can check out his blog here to see his work.
Tuesday, August 9, 2011
Western Wall Art
Here is the picture of my naked duo, as promised:
To give credit where credit is due, I found this idea in crows nest trading catalog, my poster board and mod podge rendition, however, saved me quite a bit of money.
Subscribe to:
Posts (Atom)
.jpg)
.jpg)
.jpg)