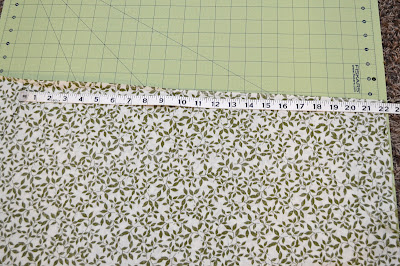
1. Dana walks you through creating a circle skirt pattern first. I'm a nap time sewer which means I'm short on time and would like to skip any steps that aren't crucial. No pattern needed here!
2. Danas measurements are for a skirt that requires no side seam. Great for little girls, or smaller women who also purchased 60" fabric. By adding one simple seam, my circle skirt fits more sizes and with less fabric too!
3. Instead of elastic, my instructions are for a waistband made from a 4 way stretch fabric. This is less rigid than thick elastic and so I find it to be more comfortable. While it works for anyone, it is really wonderful for my pregnant belly. I like anything with a nylon blend, try looking near the dance/ swim section. Yes, this type of fabric gets pricey but you don't need very much at all and I can often pair it with a coupon! We're actually going to be creating something similar to the tutorial I have posted for a DIY belly band so if you like a stretchy jersey knit- that works too!
Ok, let's get started!
What you will need:
*2 yards of 45 inch fabric. (I bought mine on sale for 2.50/ yard at Joanns! Score!)
1/4 to a 1/2 yard of 4 Way Stretch Fabric (I like anything with a nylon blend.)
Scissors and other typical sewing necessities.
Divide this number by 6.28 (Myself: 40.75 / 6.28 = 6.48 *I rounded to 6.5)
Multiply your new number by 2. (Myself: 6.5 x 2 = 13") This final number is what we will use to create our waist line!
Fold your fabric in half, right sides together, and draw a collection of dots the distance away from the corner according to your final number. (Myself: 13") Sketch to connect the dots. This will create a nice curve, and makes a lot more sense once you look at these pictures:
 |
| My sketch is a little easier to see than the dots on my busy fabric! |
Make another series of dots to create your skirt length and once again, sketch to connect those dots. See pictures:
Cut out your skirt along those two lines.
One side of your skirt is on the fold. Pin the other side together and sew your side seam together with a 1/2 inch seam.
Set your skirt aside and focus on the waistband. Measure around your waist again and add 1/2 inch for a seam allowance. Decide how thick you will want your waistband, double that because it will be folded in half and add an inch for a seam allowance. (Myself: I want my waistband to be 5 inches thick, double to get 10" and add an inch for a total of 11 inches.) Cut yourself a rectangle with those measurements out of your stretchy fabric.
 |
| *Note: I should have written "Waist Measurement + 1/2 inch for seam allowance" on the vertical line |
Feed the top of your skirt through your waistband and sew raw edges together using a zig zag stitch. This is very important because it allows the thread to stretch with stretching of the waistband.
All you have to do now is hem the bottom of your skirt. Make your hem as thick or narrow as you want depending on how short or long you want your skirt.


Your skirt hangs so nicely, Jessica!!! Looks great on you!!! Thanks for sharing how you made it.
ReplyDeleteThank you Pam! Kinda hard getting a good picture. I just feel like a whale these days and the fabric I chose is kinda busy.
DeleteYou can also do this by wrapping a string around a pencil and going from the point of the fabric measure out and use string as a compass do the same for the waist band! Putting a seam in does keep you from wasting fabric. Cute belly!
ReplyDeleteThat's a great skirt - I need a seam :)
ReplyDeleteYou look adorable, how many days left?
ReplyDeleteHugs, Jen
Thank you Jen! I'm beginning to accept the fact that I'm going to carry this baby boy full term after all. That means I have about 3 weeks left.
DeleteWow, you did a great job! You look adorable, too! Thank you so much for sharing at A Bouquet of Talent! I am so thrilled to have you. :)
ReplyDelete